I like high tensile electric fencing better than any other fence system for a few different reasons. It’s the cheapest, it’s the most versatile, and it’s the easiest to build. I also hate barbed wire and think electric fencing has made it obsolete in many, if not most, situations.

Of course, some people really like barbed wire and when I say that barbed wire might be obsolete (like I did in this post) because of high tensile electric fence, they tend to get upset. (check out that video here) However, hurt feelings do not make it less true. I know that barbed wire works. It has worked well for 150 years. You know what also still works? Horse drawn plows and hand powered corn shellers, but they aren’t necessarily the most efficient way to get the job done. If you like those things or that’s all you have available to you, that’s fine. Use them. I’ll admit there’s certain things I like or use that aren’t always the most efficient. At the end of the day though, change, growth, and advancement are a part of life that will always be here and always require us to evaluate what we’re doing if we (as farmers) want to remain competitive with the vertically integrated factory farms.
Anyway, on to my process for building a high tensile electric fence.
There are a couple tools that you do need. Only a couple of them are required. First you need a spinning jenny, the tool that holds the spool of wire and allows you to dispense the wire quickly and easily. I built mine out of some scrap metal. You can buy one pretty cheap though. You also need some good wire cutters. 12 ½ gauge high tensile wire is pretty tough stuff and will dull a cheap pair of snips or side cutters pretty quickly. Other than that, basic tools will do the job.
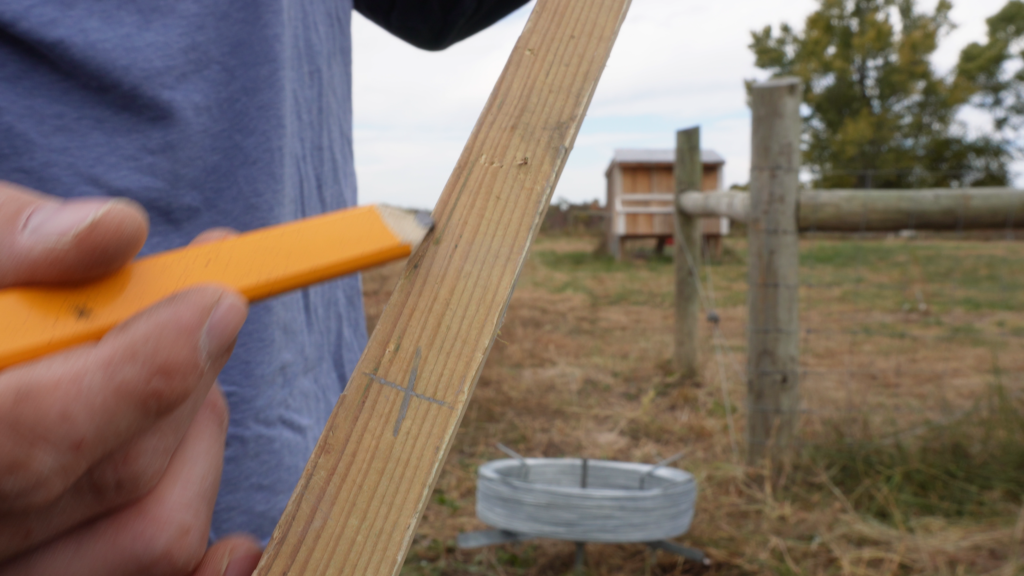
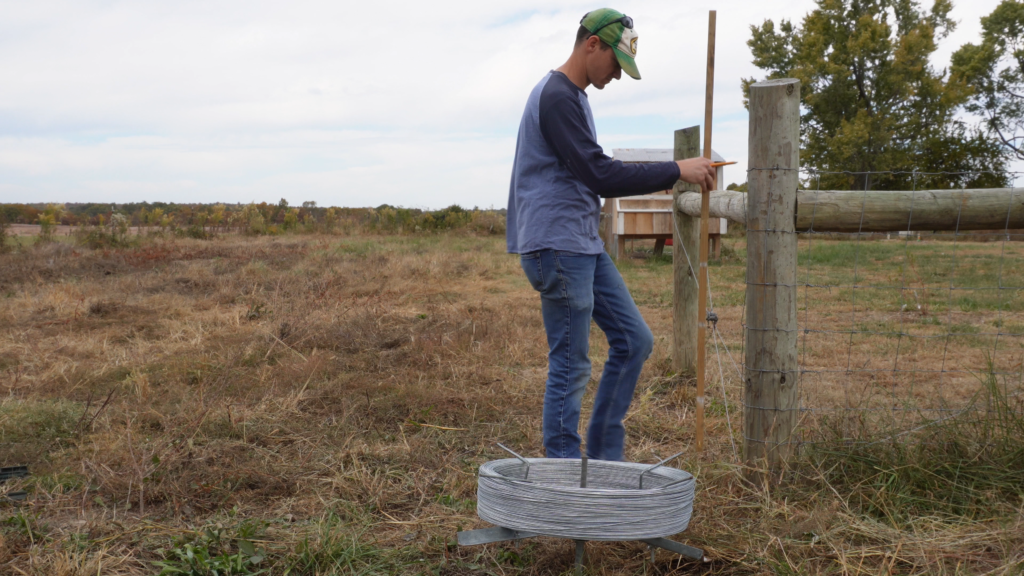
One thing I always use is a story pole or story stick. I have a straight piece of treated lumber that is about 1 inch by 1 inch and just over 5 feet long. I measure out my wire heights on the story pole then mark my corner posts. I have different marks on each side, for different fences that I commonly build. This is not a requirement; I just find that it saves me a few steps later on.
As for the fence itself, mine is a 7 strand high tensile fence because it works for every kind of animal that I like to keep. Cows, donkeys, goats or sheep, and pigs. I alternate between hot, or electrified wires, and ground, or non-electrified wires. So, in this case that would be 4 hot, 3 not.
Tool List:
Fence Supply List:
- Spinning Jenny
- Good Wire Cutters
- Hammer
- Drill and Drill Bit
- Adjustable Wrench (to tighten strainer)
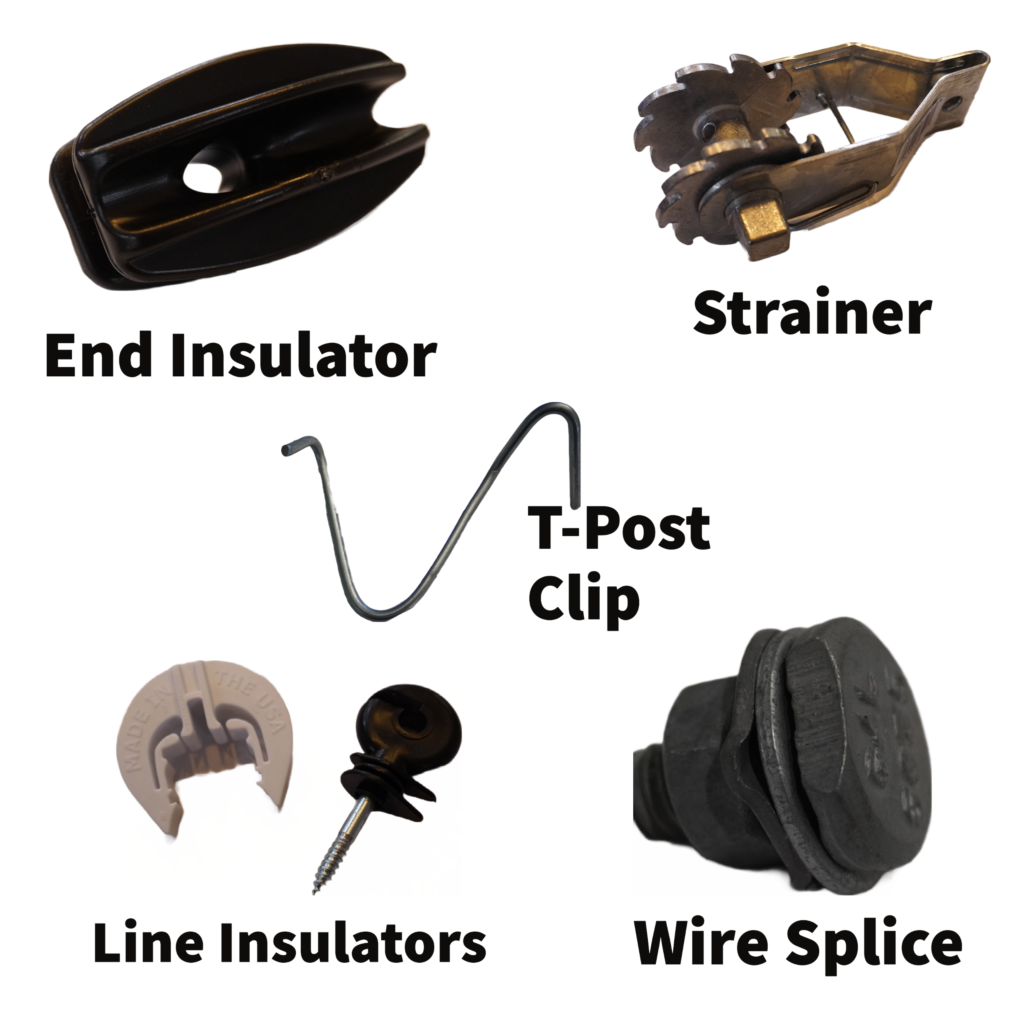
- End Insulators
- Line Insulators (for steel and/or wood posts)
- T-Post Clips
- Strainers
- Wire Splices
- Fence Steeples
- Insulation Tube or Insulated Wire
This electric fence is 48 inches tall with wires at 6, 12, 18, 24, 32, 40, and 48 inches.
Again, this is the perfect spacing to keep in the animals I keep on my farm. It will also keep out predators looking for a baby goat or chicken to snack on.
When I have my corner posts marked I drive fence steeples, or staples if you don’t know what they’re actually called… just kidding. I was once told by an elderly farmer that you drive steeples with a hammer and shoot staples with a gun. Anyway, I drive fence steeples where I made my marks so they can hold the wire in place. It’s important to note that you should not drive the steeple down tight on the wire. The wire needs to be able to move. If you drive that steeple down tight, you are creating a weak point that might lead to a failure in the future.
Next, I drill a hole for my screw in insulators and tighten them down. You don’t have to drill a hole, but I just find that it’s easier to do so.
Once I get all of this initial prep work done, I pull the top wire. I thread the wire through an inline strainer. The better strainers will have a hole at the end that allows you to thread the wire straight through, so you don’t have to cut the wire, which ultimately makes the fence stronger. The spinning jenny turns as I pull the wire. This is one area where high tensile wire runs circles around barbed wire. There are no barbs to get caught and hooked on stuff or tangled in the rest of the spool. You can pull high tensile wire through any place you can get to with little to no resistance from the smooth wire.
After I reach the end of the pull, I tie an end insulator on the post using a short piece of wire.
Next, I thread the line-wire through the insulator, then bend a kind of handle on the end and wrap it 7 or 8 times around itself. I don’t use any fancy knots because you should not be putting so much tension on the wire that you will pull your tie off apart. High tensile wire is meant to be firm, but springy. So, if something runs into the fence it will bounce back into place. The only thing that might break is a line insulator, but they often only come off the post and can be put back on easily, if they come off at all. I always leave about 55 inches or so of the top wire hanging loose after pulling it through the end insulator. I’ll explain why in a bit.
When everything is tied off, I tighten up the strainer with an adjustable wrench to put some tension on the fence so I can start everyone’s favorite part of fence building, driving t-posts… during a drought… in rocky Missouri soil. I generally space my posts 20 to 25 feet apart, depending on the way the ground lays. A barbed wire fence would require as many as 2 times the posts, again, depending on how the ground lays. I use that top wire to line up my posts, then once I get them started I will lean against the wire or put something on it to hold it out of the way so I don’t accidentally damage it with the post driver. It really is no fun to kink the wire against one of those studs on the side of the t-post. If that happens you can either splice it or pull a whole new wire. So, it’s best to just get the wire out of the way.
One quick side note
if the t-post keeps twisting as you drive it, you can put your foot against the blade to keep it straight. If that doesn’t work, a good pipe wrench will twist it back straight once you get it driven. Just put the pipe wrench on the bottom of the post, as close to the ground as you can get and pull it back where you want it to be. Yes, the post will be twisted but if you’re like me, you’d rather have it straight. In fact, there’s one on the farm here that’s driving me crazy. I need to straighten it out. I’m the only person in the world that cares about it, I’m sure, but it’s bothering me just thinking about it.
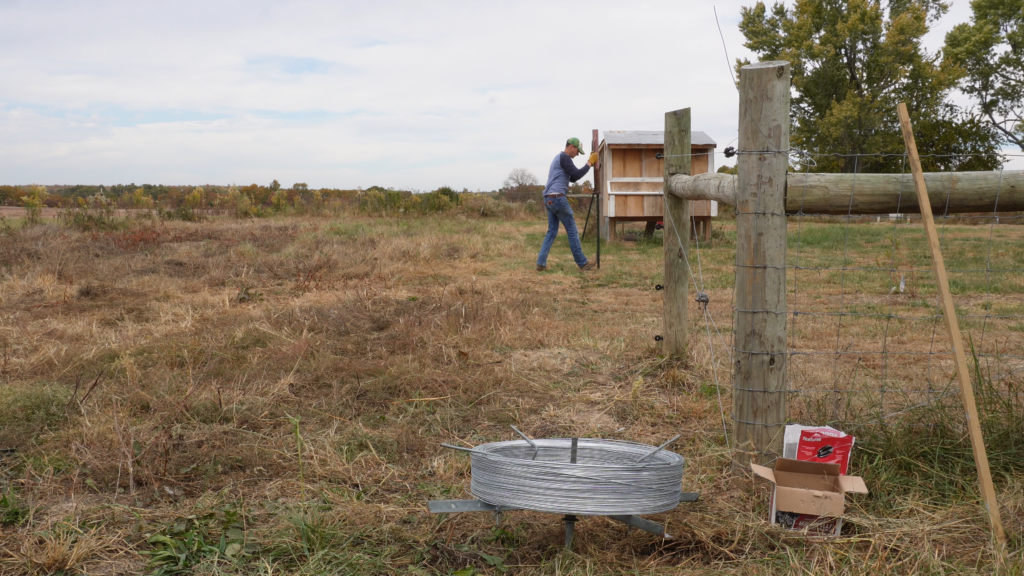
Anyway… Once I get my posts driven, I grab my insulators and the story pole and set get the top wire secured to the posts. Then, I pull the next wire. Since I’m alternating between hot and ground wires, I only need to use a strainer on the second wire. No insulators are necessary. I just tie them of to the corner posts where I put my steeples then secure them to the t-posts with regular old t-post clips, again, using the story pole to get my spacing right.
I pull the other 5 wires the same way I did the first two. I alternated the placement of the strainers just to reduce the likelihood of them getting caught up on each other by chance because as you know, if something can happen, it probably will. So, might as well take some precautions. This one is just common sense in my opinion.
Now if you remember, I said before that I always leave a long piece of the top wire hanging loose.
Here’s where that is important. I use that piece of the top wire to connect the four hot wires. I pull it down, using a section of insulated electric fence tubing to protect it from the ground wires, and connect it to a small piece of wire that I left on each strand, using cable clamps. You can get the actual connectors for high tensile wire, but I find that I can buy bulk cable clamps just a little bit cheaper. Also, they’re supposed to be galvanized just like the connectors.
Once I get all of the hot wires connected, I do the same thing with the ground wires and then tie those into the energizer’s grounding system. You don’t have to do this for it to work, but I do because it ensures that the livestock will get a good shock if they try to stick their head between two wires, no matter how dry the soil might be. This can be an issue with goats because their feet don’t always get them grounded well enough to get the full power of the energizer.
At the end of the day, there’s not a whole lot to it. It’s just like most other things, once you get the process down that works best for you, you’ll get quicker and more efficient. So, let me know what you think. If you have any comments or questions, be sure to leave them below.